Administrators, do you want to assign virtual classes to your students?
In this article, you’ll find all the information you need to manage your stock of virtual classes.
First of all, you’ll need to have a contract with access to this feature.
Step 1: Access the Account Management area
- Head to your Administration Portal, click on the "My Learners" tab, and go to "Account Management".
- Select the contract to look into (in the orange box). The stock of corresponding virtual classes will be automatically displayed in the insert entitled "Virtual classrooms tokens stock".
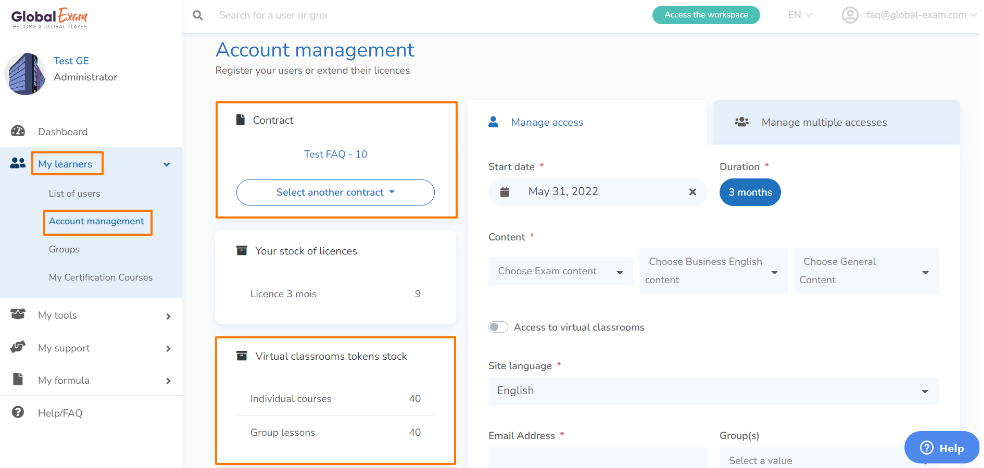
NB - The settings in the orange boxes will vary depending on the details of your contract: the minimum number of licenses to be selected for purchase, the duration of each license, access to virtual classes, and the unit price of each license can be modified with your GlobalExam contact person.
Step 2: Create accounts
You have the ability to assign virtual classes to one or more accounts at a time according to your needs.
Create an account
- From the "Manage a login" tab, fill in the mandatory information: start date*, subscription length (if applicable), content, access to virtual classes**, individual/ group lessons (the total number of credits to be assigned to each user), the language of each student’s interface, and the student’s email address.
*You can choose a later activation date, and the account will be opened automatically on the chosen date!
**Make sure to check this box so that you can assign as many courses as you’d like!
Important: Individual lessons last 30 minutes, while group lessons last 60 minutes (1 hour).
Example: to assign a student 2 hours of individual lessons + 2 hours of group lessons, indicate 4 credits of individual lessons and 2 credits of group lessons.
These credits are cumulative-- that is, they represent the total stock a student will use over the duration of their license. If you want to assign a certain number of courses per month, please contact your Customer Success Manager.
- To assign a student to a group, select the group you want to include him/her in from the "Group(s)" field (note: the group must have been created beforehand).
- Click "Create Account" to complete the registration.
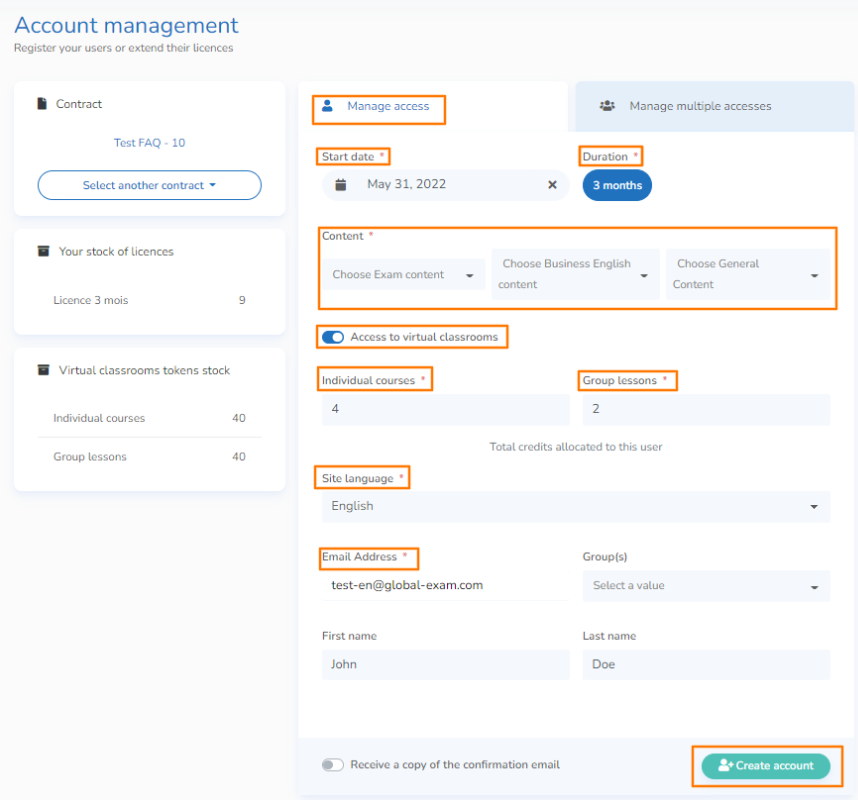
NB - Once the account is created, the student will automatically receive an email inviting him/her to create a password. You can receive a copy of this email by opting into the option at the bottom of the form.
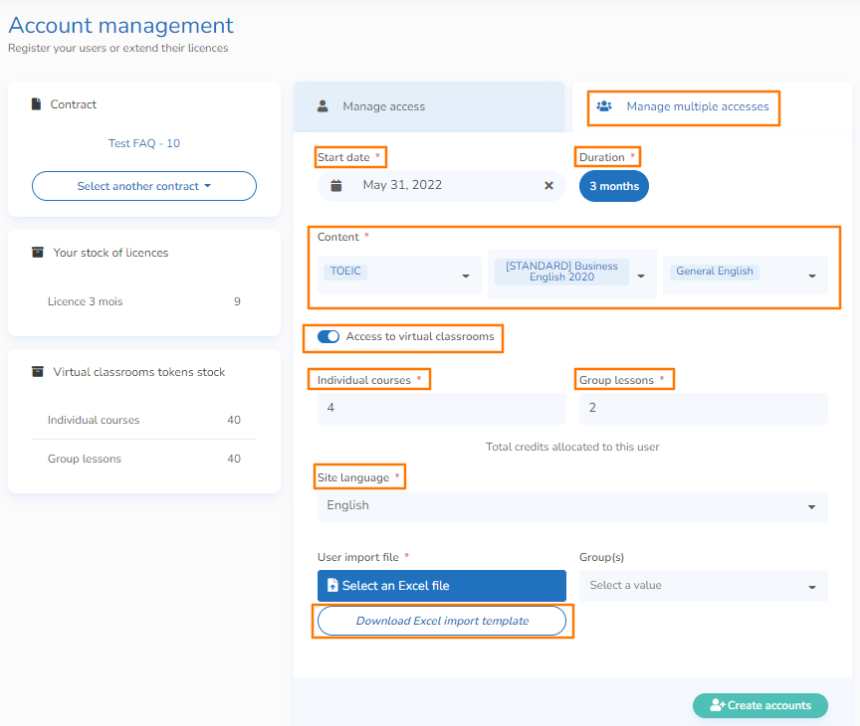
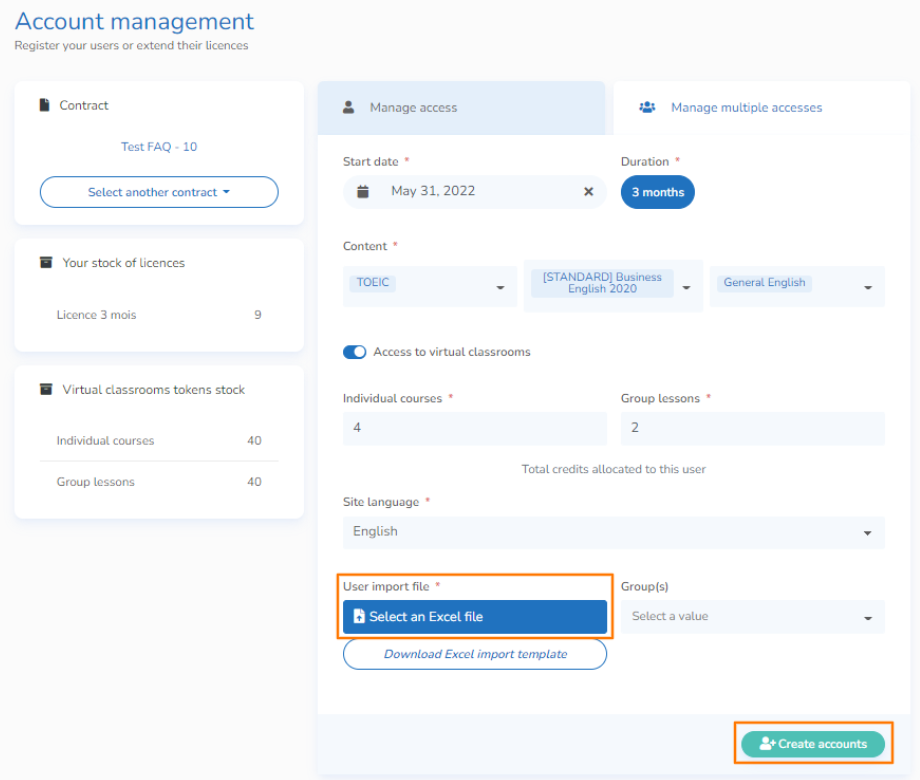
Create multiple accounts
You can import an Excel file to create several accounts at once.
- From the "Manage multiple accesses" tab, fill in the mandatory information: start date*, duration (if applicable), content, access to virtual classrooms**, individual courses/ group lessons (the total number of credits to be assigned to each user), the language of each student’s interface, and the student’s email address.
* You can choose a later activation date, and the account will be opened automatically on the chosen date!
**Make sure to check this box so that you can assign as many courses as you’d like!
Important: just like for an individual login, individual lessons last 30 minutes, while group lessons last 60 minutes (1 hour).
Example: to assign a student 2 hours of individual lessons + 2 hours of group lessons, indicate 4 credits of individual lessons and 2 credits of group lessons.
These credits are cumulative-- that is, they represent the total stock a student will use over the duration of their license. If you want to assign a certain number of courses per month, please contact your Customer Success Manager.
- Select the group to assign users to from the “Group(s)” field (optional).
- Download the Excel import template.
- Fill in the document with your students’ data (only the email column is mandatory).
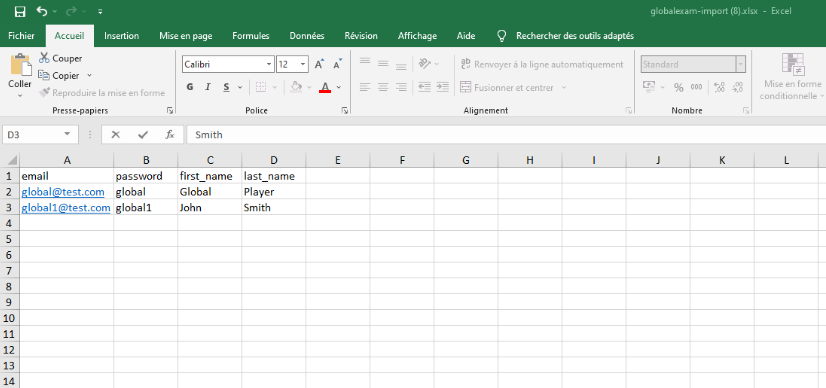
NB – Leave the “password” column of the document empty if you want your learners to receive an activation email from GlobalExam. If you fill in the “password” column, you’ll need to communicate each student’s password to him/her yourself.
- Save the document.
- Return to your administration area and click “Select an Excel file”.
- Choose the file you’d like to import and click “Create accounts”.
Congratulations! Your students’ licenses are now active! They can, thanks to the login credentials they’ll have received, access their learning platform and GlobalExam virtual classes.
NB - To assign virtual classes to learners who already have an active license, or to increase or remove courses, please contact your Customer Success Manager.
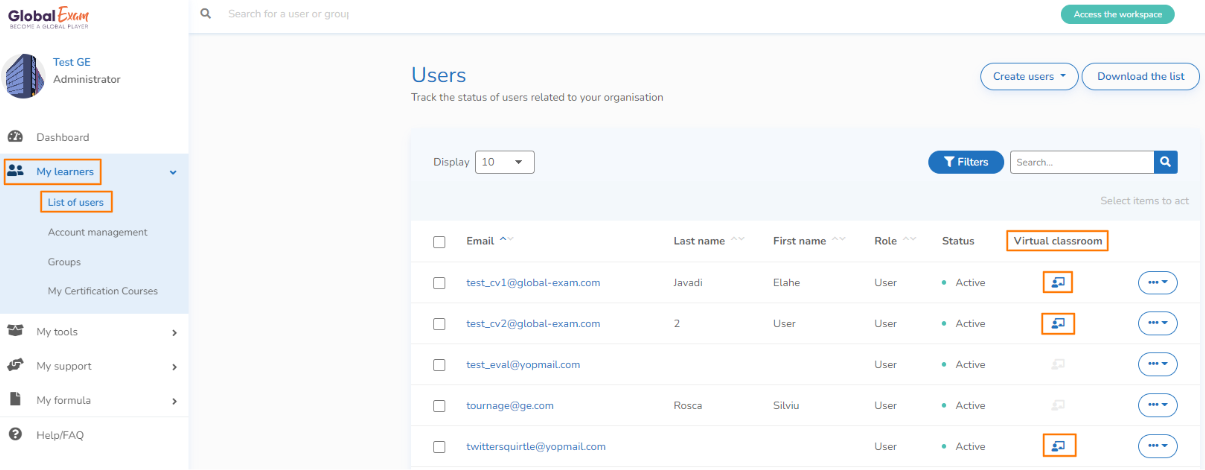
Then, you’ll be able to check which learners have access to virtual classes already by heading to the "My Learners" tab and selecting the “List of users,” where you’ll see a “Virtual Classroom” insert indicated by the blue icon.
You have other questions❓
Please contact your CSM referent directly from the "dashboard" in your admin area.

See you soon on GlobalExam❗😃