How Do I Create and Manage a Group?
Administrators and Trainers, read this article to learn how to create groups independently as you manage your activities and learners.
Step 1: Access the Group Creation View
From your administration portal:
- Click on the “My Learners” tab, then select “Groups” from the left-hand menu
- Next, click on “Create a Group”

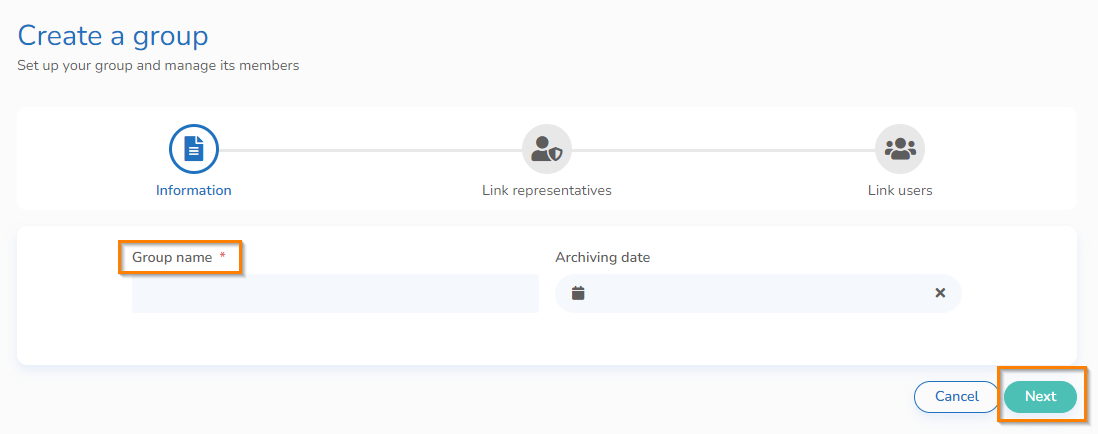
Step 2: Create a Group
- Name your group in the Group Name field
- Establish an archive date (optional)
- Click “Next”

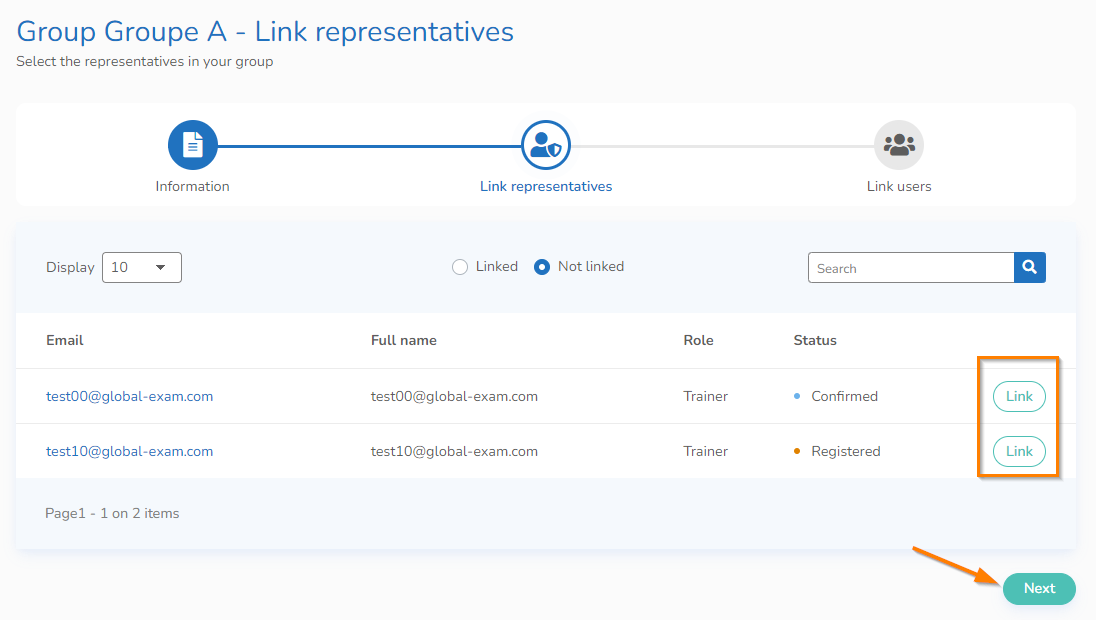
Step 3: Assign Referents
A referent is a trainer or teacher with Trainer status in the administration portal. Their role is to supervise groups and track their learners’ progress.
NB - A trainer can only add students to a new group if they are already assigned as their referent. By default, trainers do not have access to all students within the organization and can only see those they are responsible for. This ensures that student management remains structured and secure.
- Select the trainer(s) from the list of possible referents
- Click "Link" opposite the name of the referent(s). Assigned referents are visible by clicking on the Assigned radio button.
- Once your selection has been made, validate it by clicking "Next"
NB – A trainer can serve as a referent for multiple groups
You can search for an instructor in the search bar by last name, first name, or email address.

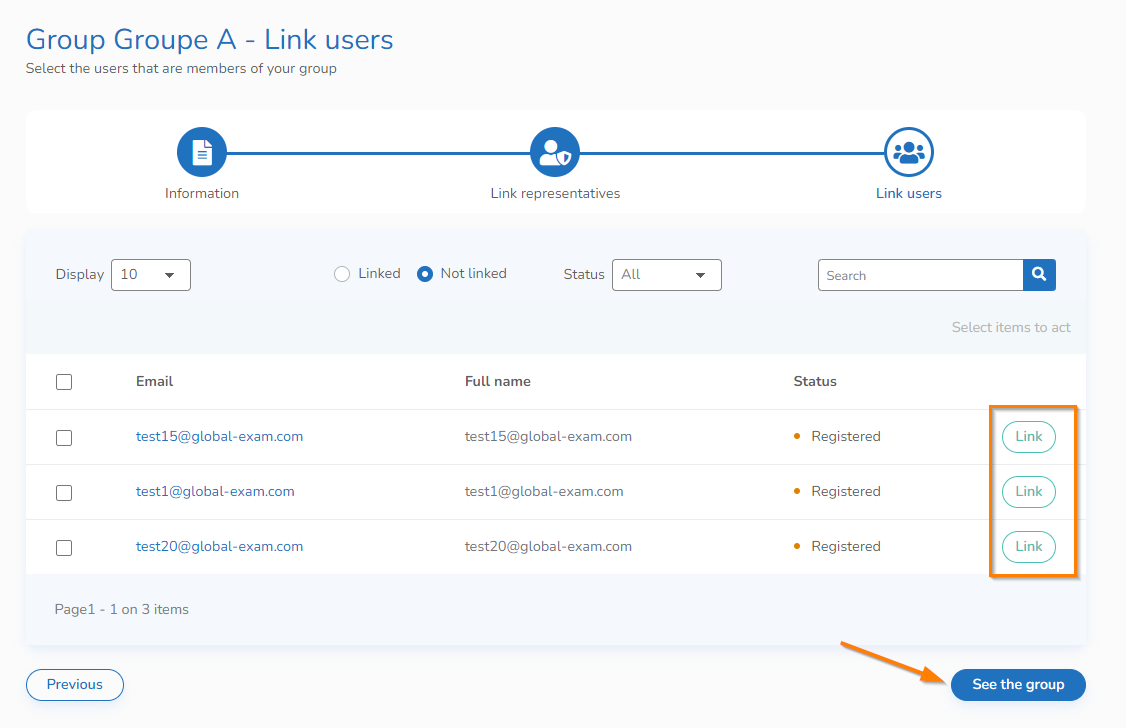
Step 4 : Assign users and view your group
For this step, select the learners you want to add to your group by clicking on the "Link" button.
You’ll then be able to click "See the group".

After that, you’ll be redirected to the group view, where you can see:
- the group’s name and archive date
- the group’s referent(s)
- the learners (users) assigned to the group
In the "Groups" tab, you can:
- Resend an activation email
- Download attendance worksheets
- Archive/activate groups
Through this tab, you can save time by applying an action to a whole group or to several groups at once, instead of individually.
You have other questions❓
Please contact your CSM referent directly from the "dashboard" in your admin area.

See you soon on GlobalExam❗😃
